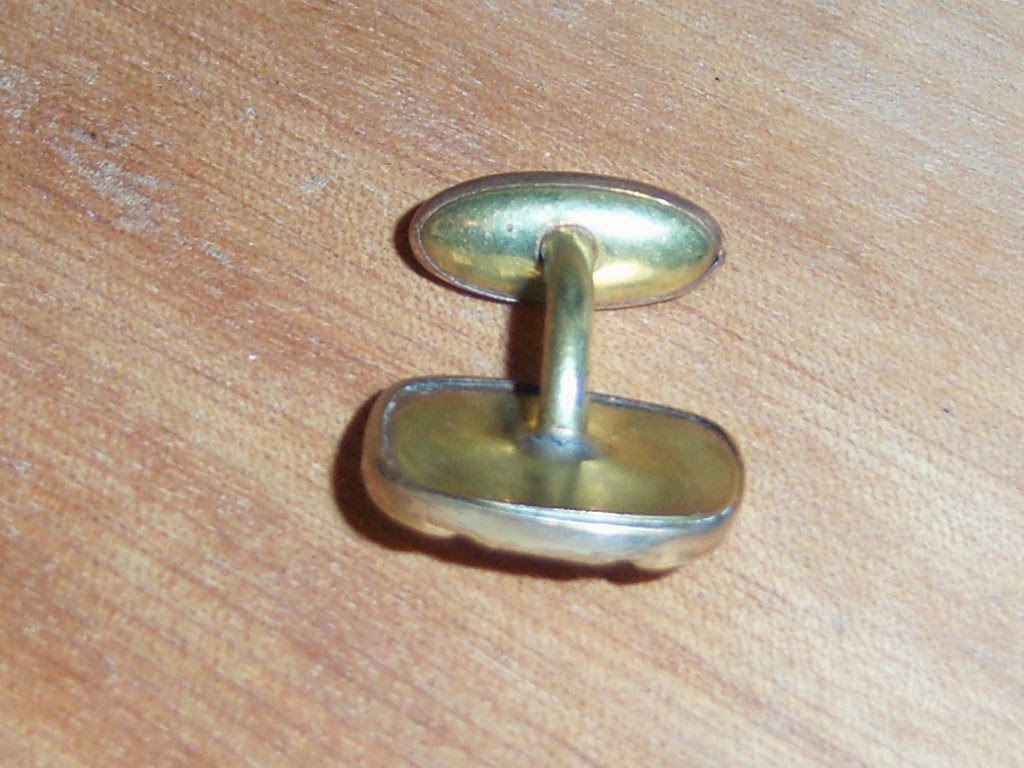
Showing posts with label Cuff Links. Show all posts

Wednesday, 4 July 2018

Finger Prong, Flip Clip, Clipback Cufflinks. How To Wear Finger Prong Cufflinks.


Today I will discuss and show you how to wear one the rarest of costume jewelry cufflinks. The "finger prong" "flip clip"or, as I prefer to call them, clipbacks. Let's take a look at these unique cufflinks before we go any further. Here are some of my own finds over the years. They are definitely not an easy find. Scouring the internet, I only see only a few sets for sale. 


      It's hard to pin down much on these little works of art. I know they were mostly made mid to late 1800's. Some were manufactured by the TRADEMARK or TRADE MARK company. I have also found other cufflinks in a bean back style dating to the very early 1900's with the same TRADEMARK or TRADE MARK company stamp. I have purchased examples in Canada as well as the U.S.A. so, again, it is hard to say just where this company had its roots without further digging. I am also in possession of a set stamped IMP Pat Pend. I assumed this stood for Imperial Manufacturing Company but, they did not shorten their name and always used a symbol. Could these be Asian imports. Some type of British Imperial stamps? Still, I haven't seen examples for sale overseas. Below: You can barely see TRADEMARK under the clips. Sometimes, it is printed in two separate words TRADE MARK.


      When looking for a stamp on these, it will always be on the back body itself. Sometimes it will give the name only. Sometimes the date only. Sometimes it will show nothing. Occasionally I have also just seen the prong itself stamped so do check as you may actually pin down a date for you cufflink. It's fun to know in case someone asks.


                                                                      1884 Stamp
IMP PAT PEND Stamp


      The next curiosity about these collectible cufflinks is the shape. For some unknown reason, they are nearly always square. They are almost always brass and, they almost always have an ornate frame around them. In all my years of looking for these, I have only found one exception to the rule. A round finger prong set stamped TRADEMARK. The set was a bit much for me to purchase in the day but it would have been a nice rare find. Every part of the cufflink was the same except for the fact it was round instead of square. It also had the 1886 date and, TRADEMARK stamp. What drew me to it other than the fact it was listed as antique? The outside frame. You guessed it, the same design in brass as some of the square ones.


      After you get past the stereotypical square frame that always seems to accompany these, everything changes. Bear in mind these frames can also have no surround with just a flat surface (especially the round examples). Most frames will be a bit recessed in order to accept a small square insert. These were generally made of glass, or stone. Ones with flat tops (no recesses) generally had a raised design as do my pick and cart mining cufflinks (below). Still, they also can have inset stones. Others I have seen included flat tops with a fern or flower motif. One of the most elaborate pieces I had missed purchasing featured a spider theme. Indented metal frame with a raised spider complete with wire legs, wire web, and fly. So basically the square shape stays the same while the tops, or inserts, change. If you are really lucky, you find a round one in good condition....


                                -Tips On Purchasing-


      I would like to add a small note on condition. These are very old cufflinks and you will be hard pressed to find a perfect example. So what should you look for when I find a set for sale? My first advice is check those photos closely. Enlarge them. Scrutinize for flaws. Obviously the tops and clips (when in closed position) should be in what you consider wearable condition. That includes dings or dents. Most brass can be cleaned up with metal polish that is available at any grocery store. Make sure you are not allergic prior to use and always wear safety accessories when cleaning. Use cotton swabs or paper towel, as you will use a rag up way too fast. Black tarnish is what should be coming off on your paper towel/cotton swabs. The most important part of these cufflinks are the backs. Make sure they have two clips on the back. You would be surprised at the ones I have seen for sale that had this fatal flaw and I almost didn't even notice. The clips will be either two small clips as seen below or, a small and a large clip (not shown). Point being, there have to be two. Next, are the clips bent? Again, I have seen sets for sale where one clip takes an unnatural turn simply because it has been unintentionally bent over. Imagine trying to get that one bent clip through your cuff's buttonhole, not to mention it will look like $*** as the prongs absolutely show during wear. The cufflink clips do have an intended curve to them but nothing excessive where the clip takes off to the left, right, or is bent in an L shape. Finally, do the clips work. Ask. Absolutely ask before purchasing. Some stickiness/tightness can be common, loose or floppy is not. And remember, both the clips and top will be showing on your shirt. I hope this helps in your selection. Check those photos carefully and enjoy this unusual, classic period, cufflink!


      Enough with touting why I find these "obsessively interesting" and on to the best part. Wearing them. Simple and secure, they make one of the best cufflinks (in my opinion) made in the 1800's. Here we go....

STEP: 1   In the photo below, you can see the cufflink in the closed position. The next photo shows the clips in the raised position (just pull up on the clips). This is the position you will use to put on your finger prong, flip clip, clipback cufflinks.


STEP: 2   Bring all your shirt cuff holes together. Align them so you can slide the prongs straight through all the holes. Make sure the top part of the cufflinks are on outside of your cuff . Left cuff, top is left side. Right cuff, top is right side. You will always slide your prongs in towards your big belly (well, that's how it works for me anyway). Now slide the prong completely through all holes.


STEP: 3   Hold your cufflink top pinched to your cuff so that the prongs are well seated. At this point, you will simply push down on the clips to close them. Loosen the clips a bit if you want to adjust your cufflinks so the top design is where you want it. Reclose prongs. You are now ready to step out and get some compliments. Enjoy those finger prong, flip clip, clipbacks! Now say that three times fast.


Friday, 13 May 2016

Vintage Cuff Link Parts

 Brought to you by http://vintagecufflinks.ca
Vintage cuff link photo

Ah, vintage cuff links. Great little pieces of artwork from the past. Today we look at those little swivel backs that become loose. Ever wonder why. I have. Vintage cuff link parts. They are basically just not fixable by the common man. Jewelers, maybe. The great part about these vintage backs is the fact that even if they no longer stay in the closed position, your button hole will still keep them on. No need to discard them. The chance of them ever falling out is very slim. Just thought I would show you what they are made of. I've taken a pair of near useless vintage Art Deco cuff links and sliced them in half. Check it out below:
                         This is what they will look like in a better condition. Tops stay centered. No flop.

Vintage cuff link closure photo

Here is what they look like after you dissect the pieces. This is the top photo part cut in half to show its workings that are hidden from the world. Till now!

Dissected vintage cuff link closure photo

Obviously not the same cuff link. But it is the exact same style of closure. Piece 1 is the outside (turned upside down of course). Piece 2 is hidden inside the cuff link end itself. This piece has a slight upward bend and rubs against the fourth piece to keep the swivel in the upright closed position. Piece 3 is the cover or "bottom half" you see on the cuff link closure's under side. Piece 4 is the bottom piece of the cuff link shaft (cut off in this photo). This has an upside down letter T shape and is hidden inside the cuff link closure. It sits between pieces 2 and 3. The magic piece is number 2. Basically unreachable by the average man. What really happens is after years of use, piece number 2's "hump"  flattens down. This in turn allows the hinged back to flop left and right as the upside down "T" is not being pressed against. Didn't really mean to get so brutal on the cuff link end but, I had to see the guts and figure out why these sometimes will not stay in the closed position. If anyone has any suggestions or tips on repair, I would be grateful for any input. This was just a little "info quickie". Thanks for checking it out.

Thursday, 18 February 2016

How To Wear A Vintage Collar Clip

"How To" brought to you by http://vintagecufflinks.ca

Today we will discuss a vintage item you will sometimes see and wonder what the heck they are and, how anyone would you ever use it.. It is the collar clip. Often, confusingly called a tie clip. Associated, but definitely not a tie clip. It is used to "lift" the tie up, and out, from the neck for a smarter retro look. Let's start by looking at the photo's below. This is a collar clip. Note the two ends with a solid center. These come in many styles and, variations of metals. Let's use one...

Collar Clip

Collar clip

A collar clip is meant to be used with a dress shirt collar that is "closer together" than most. These can still be purchased today. The collars, and collar clips, were made famous by the Hollywood movie stars of the day. The collar clip is more versatile and would definitely be the preference of most men wishing to use this style of formal dress. Let's have a look at what is involved in wearing one. ---------------------------------------


The first step would be to put on your shirt and tie. I'm cheating a bit with a dress shirt and not so well tied tie. First step is to slide the clip over one collar just about an inch up or, at your preferred height.

Step one to put on a collar clip

Next we pull the tie up over the top of the clip. Leaving the body of the clip below the tie as shown below. A very simple process.

Step to in putting on a collar clip.

From this point, we will slip the other side of the collar clip onto the other collar.

Collar clip shown in place.

That's it. Your tie will now "pop out" from your neck, giving you that classic vintage look while adding a bit of pizazz to your collar. So the next time someone asks you " What the heck is that"? you can say, "It's a collar clip". These are often mistakenly referred to as a tie clip. Many just look at it and wonder "How in hades does that thing go on a tie? Well, now you know. Read on for a couple of extra tips.

---------------------------------------------------------

Sometimes these clips are very tight and, it seems like your collar will just not go through. This can be the case with New Old Stock (NOS) that hasn't ever been used. The best way I have found to remedy this is to place a dime in the open space on each side of the collar clip and pry upwards or, downwards until the clip slides on more easily. You are just bending the metal clip outward a bit so it will not be as tight. Check out the photo below for a visual.

Adjusting a tight collar clip to fit.

Just one last mention here before I move on. These absolutely do not have to be worn with ties. If you aren't going formal, then you can always just add the collar clip as another accessory to your wardrobe. In this case, try to find one that has a bit of flair to it rather than a straight bar. I'll show you my example below which actually looks quite nice. These items are truly versatile.

Wearing a collar clip without a tie.

Well, that's another post I hope you find informative. Don't be worried about checking these vintage clips out as they are easy to use and, add that little something extra stylish to your men's (and women's) wear. These collar clips are also still made today. Check them out next time you get a chance to wear one. See you again soon and, don't forget to check out my online cuff link shop below. Thanks everybody,  Rob 


Thursday, 4 February 2016

Antique Cuff Link Terminology

"How To" brought to you by http://vintagecufflinks.ca

Today I will discuss antique cuff link terminology. When purchasing cuff links, the description should include the type of closure that the cuff link employs. I will give a brief description, and photo, of each closure to help you better identify just what to expect prior to purchase. Please feel free to add any comments and, I will include them in this post. Please realize that some of these styles continued on into later years but, you will see some differences (with the exception of the chain link style). My next post will be on vintage to now cuff link closures. So, stay tuned for another post in this category.

Let's begin by looking at common terms you will see when searching for antique cuff links.


1- Fixed Button Back Cuff Links


Fixed button back cuff links are not actually buttons at all. But they do look like a button. This type of cufflink does not have a closure of any kind. It is one solid piece where the back slips through the button holes, thus securing the cuff links.


2. Pivot Button Back Cuff Links.

This type of cuff link is exactly the same as the previous one. They look exactly the same with a back looking similar to a button. There is a difference though. The back has a small hinge type mechanism that allows the back to flip up as shown in photo above. This aids in slipping the cuff link end through the button hole. After inserted, you flip it back down to secure it. Exactly the same as the fixed, except this style has hinge.


3. Fixed Shaft or Solid Shaft Cuff Links.

This term refers to the cufflink as being one solid piece. Each end is permanently attached and, will not move.


4. Clip or Clip Back Cuff Links.


These style of cuff links will have two to four clips on the back. The clips are on a hinged mechanism. Shown on the left are just two of the many styles and, are in the closed position. Shown on the right, the cufflink is in the open position and ready to insert into the button hole. After insertion, close the clips (as on the left)  to secure. You will often find these in only one instead of a set. In this case, they are often misidentified and labeled as "lapel" or, "collar clips". This is one of my most favorite antique styles as the cuff link has a strong closure. You never seem lose them off your cuff. If you can find them, and like the look, definitely buy them. Most have the date of manufacture on the back. Mostly found in the late 1800's.


5. Ball Back Cuff Links.


 As the name suggest, the ends will be rounded like a ball. They are commonly found on  style #3 above and, do not move.


6. Bean Back And Football Back Cuff Links.


Named only for their shape. One supposedly resembles a coffee bean and, one supposedly resembles a football. These type of antique cuff link will always be fixed as in style #3 description above. These cuff links have no moving parts.


7. Chain Link Cuff Links.


As the name suggests, each end is connected by a small chain. These older antique cufflinks generally had a thicker chain. As long as there has been chin, there has been chain link cuff links. 

--------------------------------------------------------------------------------------------  

I  hope you have picked up a little information for your next antique cuff link shopping adventure. The joy of finding these small pieces of history is exciting. So many different, unique, and interesting designs can be found. You will probably be the only one in town with the same pair of cuff links. That is part of the charm of owning antique cuff links. I haven't even touched on material or, maker's marks. But, you should be able to look at a cuff link (and it's back), and make a decision on weather it is antique or not. Hope this helps someone out. Stop by again...Rob.


Saturday, 12 December 2015

How To Put On Button Covers. The Cuff Link Alternative.

"How To" 

Photo of button covers

Lets give a quick rundown on the best way to dress up that non French Cuff shirt. You would just love to wear cuff links but, between the price point of a French Cuff shirt and the added expense of cuff links, what's a guy or gal to do? Welcome to the world of the "button cover". Button covers are generally less expensive and, can be just as handsome as any cuff link on the market. Just for today, we are going to wave goodbye to the cuff link and say hello to an old standard even your kids can operate. The "Button Cover".

Let's take a quick look at these amazing little pieces of wrist candy called...


                                                           THE BUTTON COVER
                                                        
Photo of button cover
 

     Button covers come in an array of shapes and sizes. They aren't all round and, come in as many interesting styles as a regular cuff link would. One thing does remain the same though, the attachment. No matter what size or shape they take on, the back will always be the same.


                                                   THE BUTTON COVER BACK
Photo of button cover back.


     Here we have the back of a button cover (they come in sets but, we will just look at one). The user friendly piece is that odd shaped metal on the back. This is the part that will slip under your button. Let's drop down a photo and see the "guts" and, how the mechanism works.


                                                       OPEN BUTTON COVER
Photo of open button cover

     Here is the button cover ready to be used. It is in the open position. To open these is quite a simple task. Just pull on that odd shaped piece of metal. It is hinged and, only held in by clips that nestle against the inner wall of the button cover. So easy, that even a child could do it. What you now have is an open and ready to wear inexpensive pseudo cuff link. Let's put it on.

                                             
                                                     INSERT THE BUTTON COVER
Photo of putting on a button cover


     The first thing we want to do is slide that odd looking metal piece "under" your button as shown above. It slips in very comfortably with no resistance. These are a dream for any man, or women, in a rush to get out and get going. Such a quick little invention. The best part is they will work on any shirt with a button. You can even use them to dress up your top neck button. Great stuff. Now let's take a look at what happens next....


                                                 SEAT AND CLOSE BUTTON COVER
Photo of a fully inserted button cover.

     Here we have pushed the button cover all the way under the button. As mentioned earlier, it is amazingly easy to do. Our next step is to just close the cover (top). That's it! Ten thousand times easier than struggling with cuff link holes. They can be worn on anything that has a button. Let's take a look at how this all turned out. No different than any cuff link and, at a fraction of the cost.


                                                        THE COMPLETED LOOK
Photo of a button cover on sleeve

     A very smart and easy look to employ. Button covers are extremely comfortable as well as secure. For those with metal allergies, the great part is that no metal touches your skin. Kids love them, adults love them, it's a "win win". Fantastic for anyone in a rush. What?! No French Cuff? No problem! 


Please share us with your friends.

Tuesday, 17 March 2015

History Of Cuff Link Closures. 1800's To 1970's.


These are my observations as I perused (one by one) the patents from the 1800's to 1970. Please don't hold me too accountable for omissions or small mistakes. I have highlighted years and styles for quick reference. 

 Here we go, I hope you enjoy.... Cuff links and closures. The cuff link has gone through a strange and varied history. Cuff links are not just limited to men's wear, and the ladies are finding them just as fashionable as men. This is not a new idea, as women wore them ages ago. Going through Patents, I will try to give a brief history of the cuff link and closures.


1800's. Bean Backs, Button Backs, Ball Backs, Clip Backs (finger prong). 


Cuff links generally reflect the times they were made in. Cuff links fall into a few categories. Bean backs were one piece cuff links with the back looking somewhat like a small bean, or football. Ball backs were just that, a small roundish ball at the opposite end of the cuff link. Button backs had a small button at the back that could be either fixed (not moveable), or on a centred pivot. Clip backs (as I call them) were generally square and had two clips at the back as the attachment of choice. These clips moves up and down to close or open. Their common name known to most collectors are "Finger Prong" cufflinks. The last photo shows the open and closed position. You would open the cufflinks, put them through the cuff holes and simply close them. The prongs look quite smart as they show on the opposite side of your cuff. See examples of all cufflink styles below:

Antique Ball Back Cuff Links
Bean Back Cuff Links

Button Back Cuff Links

Clip Back Cuff Links

These were the styles to choose from in the 1800's. All were functional and my favourite are the clip back just because of the closure mechanism. Stones or depictions of flowers, nature, and work (like mining picks, shovels, wheelbarrows etc.) were the norm. Cuff link closures basically did not change much during this era and fine examples are still to be found. Sometimes an older clip back or cuff links from this era will have the patent month, day, and year, or the last two numbers of the year stamped into the back. Antique examples are very unique.


1900-1910 bean back and ball back.


Bean back and ball back cuff links continued into the early 1900's. Although the styles were changing with a bit more design on the fronts, button back and clip backs were falling out of favour.


1920's. Snap cuff links, swivel back, double sided, retractable chin, and the collar button with tie stay.

The 1920's went into high gear in the cuff link trade. Types of closures seemed to spring up everywhere and were all vying for top spot. Two piece snap cuff links (second photo) had just emerged. See below.

Swivel Back Cuff Links
Snap Cuff Links

Other styles included cuff links with ends that moved on each (or one) end connected by a bar or wire. Swivel back ( a smaller example of the button back pivot, and over all looking a bit like a bean back) became popular. Double sided stationary cuff links, that did not move, connected by a single shaft. Pull out spring loaded cuff links.  The first retractable chain cuff link. Collar button with tie stay, (looks like a small button with an elongated triangle on the opposite end). The button half went through the collar holes and the triangle part hooked onto the tie. The first patented crude tie clip with jagged teeth. Cuff links connected by a chain. The options and choices must have made them feel like modern times had finally arrived!


1930's. Snap cuff links, double toggle, and large bullet toggle.

were having their final decade. Some of them were being made with semi oval extensions in the hopes of wooing the public. But the snaps were thought to be hard on clothing and they were fast falling out of favour. 1936 brought in the first patent on the modern day toggle closure. Pat. # 002052437 was attributed to H. G. Anderson. Amazingly, a double toggle also came out. The cuff link was comprised of a toggle closure on each end. That's it. That was the cuff link! The first solid closure that I refer to as a "bullet" toggle also came out. Unique in shape. See photo below:

Bullet Back Cuff Links

 These "bullet" toggles are rounded off at each end like a bullet. This style was more the exception than the norm. They will be smooth with no cut in circles at the ends. The toggles will be longer than those produced in the following years. I think they look cool as hell, by making a smooth classy transition to the end of the cuff link. Some say toggles were not widely accepted during the 1930's but, by the look of the number of patents on them, they sure were waist deep in 1930's cuff link history.


1940's. Today's rounded end toggle, oblong toggle, flat end toggle, and slanted end toggles.

Cuff links finally settled in to look more like today's closures. They were rounder and the ends had that little extra cut in piece for aesthetics. Some toggles were "fixed" and did not move so were clearly not toggles at all. The first "oblong" toggle was out. See photo below:

Oblong Back Cuff Links

          Below: Classic 1940's cuff links feature "lines" on toggles and shafts.


Unlike the round bullet style, the oblong cuff link closure was flat on all the lengths and only rounded at the end tips. Sides were not rounded. Closures also included a flat end toggle with four straight sides, imagine a rectangle. Chain cuff links also came into vogue. Two metal ends with a simple chain to connect them. The 1940's were moving closer to today's standard.


1950's Clip on cuff links, barbell toggle, hinged folding cuff links, whale tail, short bullet toggle, and a double top V cuff link. 

We kept on using some of the same closures. The oblong toggle was one that  held strong and continued into the 1950's. A new addition was a clip on cuff link where a toggle went through the button hole on one end, and a money clip looking attachment ran around and just slid on to the opposite cuff. A unique toggle that appeared in the 1950's was a toggle that looked like a barbell. Round in the middle with a ball on each end. Actually, quite a nice look that just didn't seem to continue for whatever reason. The barbell toggle was a very classic 1950's addition. The double toggle cuff link also resurfaced. Two toggles and a shaft. The toggles were the cuff link heads. Odd, but serviceable. Folding cuff links were having a resurgence as well. Most of these were cuff link heads attached to what would look like the bottom half of a safety pin, but with a working hinge. Another type that should have held on, consisted of a "V" shaped wire. The toggle was at the bottom of the V cuff link. The two ends of the V each held a small cuff link head. Imagine, two cuff link heads on each button hole! Great invention, but unfortunately it also got passed by. The fifties had kept the standard closures,  while the experimental types never seemed to make it far enough down the runway to fly. The slightly rounded two piece whale tail toggle. They took a slightly rounded head piece and added a flat bottom held on by two metal clips. See photo below:

Whale Tail Toggle Cuff Links

I'm not sure why, but I believe this was probably a cost saving measure as this made the inside hollow and less expensive to produce. The first patent I have seen for this was in 1949. 


1960's. Rectangle toggles with round ends, mesh cuff links, and double toggle cuff links with rounded (rather than square) ends.


Rectangle toggles with round ends also came in fashion. Bullet toggles also returned but were shorter than the originals. Another style was a solid toggle that when viewed from above was wider in the centre and then slimmed down to rounded ends. Somewhat like the bullet style, except with a much wider centre where it met the shaft. Finally today's classic toggle had arrived. Round with etched machined points. Another curiosity had returned with a slight twist. The two toggle cuff link. Only now, each end was now oblong instead of rectangular. It kept trying.... In 1968, the first wrap around mesh toggle came out,  Patent # 0003418699. A new style had finally been developed and time would be the judge of its longevity. It didn't last more than another decade. See photo below for an example of a mesh wrap around cuff link:

Mesh Cuff Links


1970's. Cuff link bracelet, interchangeable cuff links, cuff links with a safety chain for the toggle, and a toggle with safety wire wrapped around it.


Cuff link designs were more about safety than reworking the closure mechanisms. The mesh style cuff links as shown above seemed to have waned with the seventies, and their popularity began to fade. One interesting design that did come out though was the "cuff link bracelet". It consisted of a bracelet that went around the outside of the cuff and was held together by a toggle or a separate cuff link put through the bracelet's end holes. Imagine a more bejeweled and larger sized mesh wrap cuff link. You ended up with the best of both worlds. A snazzy bracelet and a pair of cuff links! The next idea I personally think was great. Interchangeable cuff link heads. Didn't like the look for tonight's presentation? Snap on another look, and be a new man in seconds! The seventies seemed to be just as much into securing your cuff links. A small plate was invented to fit over the toggle when it was in the open position. When the toggle closed, it held the cuff link securely in place so if the toggle turned a bit, the cuff link would not fall out. Cuff links with a safety chain. The chain ends had rings. One ring was attached permanently to the shaft. The other ring slid over the toggle after it had entered the button hole. Secured! Another unique invention, the wire toggle. This was a wire that wrapped around the toggle which prevented the toggle itself from moving in either direction. Looked as good as it worked. Well, there's my quick rundown of cuff link closures. I'm sure I have probably missed a few. I was just looking through the patents from the 20's to the 70's and thought I would post this as a small info. blog. Please bear in mind that quite a few of these designs carried on into later years and the beginning dates are just that, the years of patented invention. I hope you enjoyed this small look at cuff link closure history. Please visit my online vintage shop to see some of these examples for sale. Just press the link below.